How we do design sprints – mapping and sketching days part 2
These first 2 days are so important because they’ll set the direction for the rest of the week
As you can imagine there’s a lot to do in a design sprint. Last time I wrote about why we would choose a design sprint, who we need to involve, and how I like to shape days. In this part, we’ll look at how I organise a typical week, focusing on the mapping and sketching days.
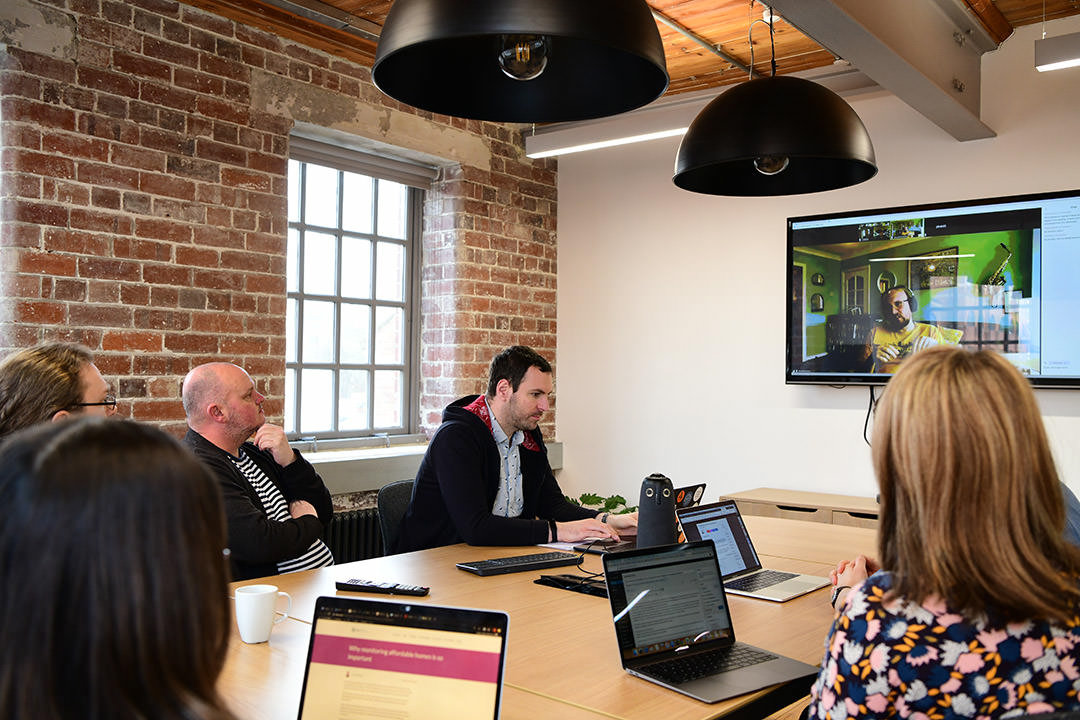
I’m a big believer in planning and spending the right amount of time on understanding a problem and coming up with ideas as a team. These first 2 days are so important because they’ll set the direction for the rest of the week. It’s time for the whole team to influence direction, so prepare to bring lots of energy and get everyone involved.
As Gaz, our head of design says, “We’re all custodians of good design.”
Daily themes
Jake Knapp and John Zeratsky came up with different themes for each day of a 5 day design sprint, which help to provide a focus and direction:
- Monday – map
- Tuesday – sketch
- Wednesday – decide
- Thursday – prototype
- Friday – test
A lot of people take the vanilla Google Ventures design sprints and quite rightly rework them to fit their needs. It’s not unusual for an organisation to have conducted research, pulled out the findings, and have a lot of context and lessons learned to share with the team. Or you may find that they already have an idea of what they need to do and you need to speak to comparator organisations that have done something similar.
In situations like this, some of the Monday activities may not be required. You may choose to reframe activities to change their purpose, or shorten them and use them as a way not to find out something new but to share context with team members.
After you have a couple of design sprints under your belt, you’ll be in a good position to understand what you expect to gain from the activities and be able to cherrypick the ones that are of benefit to you. For the purpose of this blog post, we’ll look at the default activities. If in doubt or if you’re new to this, then I’d recommend that you follow this schedule.
Monday – map
Monday is when we become trailblazers and forge a path for the rest of the week. We think about our long term goals, things that can stop us from achieving them, map user journeys and speak to experts, all to find an area that we want to focus on.
Before we can start work, we need to know what the purpose of the design sprint is. So we begin the day by looking into the future and identifying our long term goal.
Defining the long term goal
This is a very optimistic view of the world, so don’t worry about anything that could possibly go wrong or cause the project to fail. Instead, focus on a world where our service is a complete success and try to describe what it does in a sentence.
Sometimes organisations have an idea of what this is before the design sprint begins. Other times you’ll need to review what you already know and the project scope, and try to reconcile the two. This can be done using a number of different techniques like writing problem statements.
It’s important to keep it short. Long goals that span sentences and paragraphs are warning signs that the team may not have a clear understanding of what they’re trying to accomplish. If you can’t articulate your goal in a sentence or 2 then I would strongly suggest that you pause, speak to the team and stakeholders, and get something agreed. It’s better to spend time getting clarity at this stage.
Once you have the long term goal, I like to ask everyone to do following:
- try to write down why we’re doing this
- state where we want to be in 5 years’ time when this is a mature and fully formed service, then
- affinity sort your post-its
I find value in affinity sorting at the end as it gives time to reflect on what others have written and simplifies a board of post-its into a handful of more memorable themes.
Sprint questions
Now that we know where we want to get to, it’s time to flip things on their heads. Try to be pessimistic. Get into the mindset that anything that can go wrong, will go wrong, and list your assumptions, blockers, and problems under some question headers:
- What has to be true to achieve our long-term goal?
- If the website/service was a failure then what may have caused that?
- What questions do we want to answer in this design sprint?
Map the journey
We need to map the user journey to capture the complexity and nuance of the service. We’ll use this throughout the week and refine it as we learn more. It’s a prop to see how everything fits together and works as a memory aid.
Start with the users on the left hand side. Remember that this could be members of the public, or staff working in a back office. Then add the end of their transaction/journey on the right. While it’s tempting to want to start filling out the middle straight away, after all, that’s where the fun stuff is, it’s important to agree on an ending or output.
Once we have this in place it becomes easier to fill in the gaps using post-its and arrows. We’re looking for something functional and simple, not a work of art that’s really detailed. The ideal map should be anywhere between 5 and 15 steps.
Ask the experts
Now we can see things taking shape, it’s time to get some more detail. This is traditionally done through a series of discussions with subject matter experts. These discussions will be part discovering new information and part building a foundation of shared knowledge for the team. Don’t be afraid to ask “simple questions”, especially if you know the answers as other people may not.
When speaking to people outside the sprint team it’s important to explain what you’re trying to do. While not a definitive list, these 7 steps will certainly help.
- Introduce the sprint, don’t assume any prior knowledge, and say what it’s about
- Be clear on time frames. If a person knows how long they have it can help them answer in an appropriate amount of detail
- Review your work. Spend a few minutes going over the goal, sprint questions, journey map, and anything else that may be relevant
- Now they have the context we can ask them to tell us what they know about the challenge we’re facing
- Ask questions, dig deep, get them to fill in the blanks in what you know, and ask them what you’re missing. They might tell you that you’ve misunderstood something and it’s better to know that now, than when user testing
- Update your work. Experts might tell you things that change your understanding. Capture this otherwise you’ll forget and that nugget of truth will be lost to the sands of time
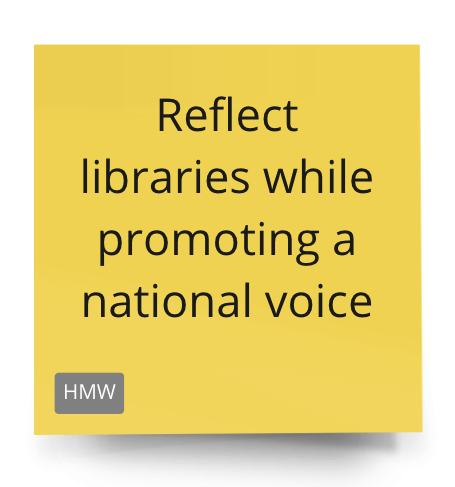
- Listen for problems they identify and record them as “how might we?” notes
“How might we?” notes
This is a really powerful exercise as it’s a way to change problems into opportunities. It’s also something that’s undeniably awkward when doing it the first few times. That’s not a problem or a reason not to do it, just warn people and ask them to go with it. You’d be surprised at how far that will go to allaying any worries.
Remember that the whole team wants to succeed. It’s helpful for them to know that others may also find aspects of the sprint challenging. I explicitly mention it here, because if you’re doing this remotely it’ll be harder to read the room and track people’s emotions.
The process of creating “how might we?” notes is relatively straightforward. Put HMW on a post-it, listen for a problem, then rephrase this as a question and save it for later.
After asking the experts, put all the “how might we?” notes in a single place and affinity sort them. I’d recommend setting a time limit for this. Apps like Miro allow you to set timers so people can work on this activity individually or together. You should see your jumbled mess become a collection of themes.
Now we need to find out what the most important things are. This could be the biggest or riskiest problem or the area where you feel the team can add the most value. Dot voting is a great way to stop this becoming a lengthy debate that’ll drain energy and momentum. Again many apps will allow you to give each person a few votes. When remote these 2 activities provide a much needed break from the video call, people can mute themselves, turn off cameras, and think about the tasks.
The last step is to take the post-its with votes and add them to the journey map you created earlier. This should now provide some indication of where the biggest opportunity is and will segue nicely into the last activity of the day.
Pick a target for the sprint
While this ultimately falls on the decider, they should have some good direction from the last activity. Not everybody is comfortable making this decision especially if it’s their first time in the role. If they would like some help, then run a straw poll.
Get people to vote anonymously by indicating which part of the map they think is most important, discuss any differences in opinion, then your decider should be ready to make a decision. Choose one target user and one target step on the map and this will become the focus of the sprint.
Now we can look back at our sprint questions and we should see one or more line up with the target.
Tuesday – sketch
Tuesday is ideas day. We’ll seek inspiration for solutions, review ideas, remix and improve them. In the afternoon, we’ll produce a solution sketch that’ll inform our prototype and user testing.
Lightning demos
As Picasso said, “Good artists borrow, great artists steal.” So don’t reinvent the wheel here. Review your sprint goal and target and with these 2 things in mind, look to the real world for examples of how people have approached similar problems.
We’re looking for things that can inspire us, and this doesn’t preclude looking at solutions within the same field or industry. I’d normally recommend spending about 25 minutes on desk research for each idea. If people prefer, this can be done beforehand in preparation for the day.
Once everyone has prepared, it’s time to play this information back to the team in quick 3 minute demos. Assign someone to capture the best ideas as you go. A useful technique can be to write a headline that encapsulates the idea, some people like to pair that with a rough sketch if you have time.
It’s useful to get people to share their particular themes in advance, so you don’t end up looking at the same kind of thing. Some people might come back with one idea to demo, others may have several. 3 ideas per person is a good amount to aim for, but it’s not a problem to have less.
At the end of this activity, you’ll probably have 10 to 20 good ideas. Enough to be representative of the best ideas but small enough so that you are not overwhelmed.
Divide or swarm
This is more of a quick chat and decision rather than a full-blown activity. We know what we want to look at (our target), but this could cover a couple of sections of a website/service. Look at the size of your team and work out if you’re all going to focus on the same thing or spread out and look at 2 or more.
If you’re dividing up then there’s no need to get a perfect distribution.
Sketching
To some people, this is both the most intimidating and fun part of the design sprint. Some people find sketching activities tough. They worry that they can’t produce something that’ll be useful. It’s really important to acknowledge this and that they’re not the first person to feel this way and they won’t be the last.
Fortunately, the Sprint book has a fantastic 4 step sketching process that, in my experience, never fails (you can see the highlights here). I frequently get feedback that the sketching activities turned out to be really rewarding.
Set expectations and try to make people comfortable
Dedicate some time to talk to people through what we’ll be doing. Explain that the sketches we’ll make are not pieces of art, they’re a functional representation of our abstract ideas. If you have examples of sketches from previous design sprints, then show them. Showing what good looks like gives people something tangible to aim for.
4 step sketch
Sketching is an independent activity to allow for some deep thinking, but it’s important to offer people help if they need it. If you’re facilitating, make it clear how someone can ask for help, be it via Slack, video call, or another way.
Step 1 – review what we learned
This is a simple first step and a great confidence booster. Explore the Miro board, look at whiteboards, post-its, notes, doodles. These are all the notable things we’ve learned and didn’t want to forget. Use these to refresh your memory.
Copy the sprint goal, questions, map, “how might we?” notes, lightning demos, and anything else that speaks to you. We’re not looking to draw insights or form ideas at this stage, or to sketch. This is to cement your knowledge. I like to copy the main points to paper, then highlight the most important bits.
Step 2 – create ideas
Next, we take this information and create some rough ideas. The output of this step is normally very different for each individual. Some people will doodle, others will write down a sentence or headline that captures an idea. There’s no right or wrong way to do this, as long as you’re collecting ideas then you’re on the right track.
It’s important to remember that no-one else will see this step. It’s fine if you’ve drawn something that’s part finished as long as it makes sense to you. Once I’ve completed this step I like to spend a minute quickly prioritising my ideas. The objective here is to identify the best ideas so that we can explore them more in step 3.
Step 3 – crazy 8s
If you’ve ever played a game like Pictionary then you have an idea what to expect in this activity. Take your strongest idea and sketch 8 different versions of it in 8 minutes. The goal is to push past the obvious initial solutions and consider alternatives that could make the idea better. Push yourself to think of as many different versions as possible.
When you’ve finished, you might have unearthed a gem or an exciting new direction for an idea. Sometimes that doesn’t happen, and occasionally that first idea really was the best. Don’t worry if this is the case, it’s still a valuable activity. At the very least you’ll have broken through the initial awkwardness we sometimes feel when sketching.
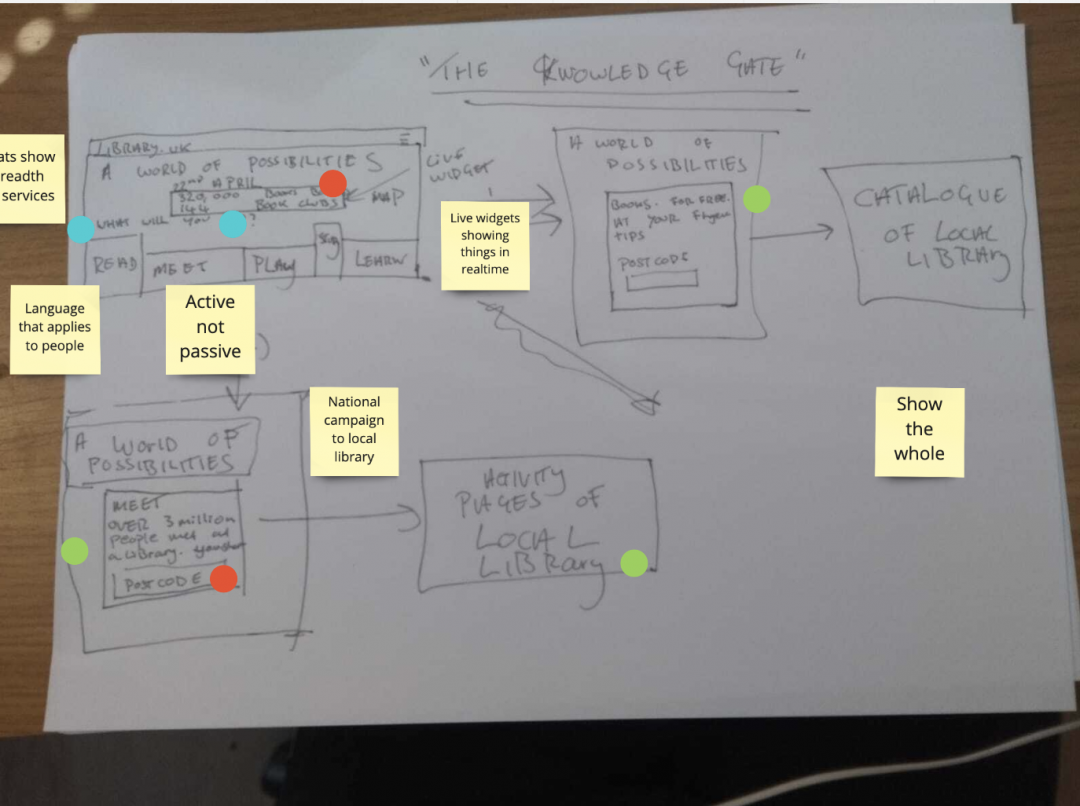
Step 4 – the solution sketch
This is what we’ve been leading up to, now’s the time to sketch your best idea. Throughout this process, we’ve been reviewing what we’ve learned and trying to turn abstract ideas into concrete sketches. Our solution sketch will be shared with the team to help us solve the challenge we’re grappling with.
A good solution sketch will be opinionated, detailed, well thought out, easy to understand, and anonymous. Someone should be able to look at the sketch and understand what it is and what it’s trying to do without being biased by personal relationships and feelings.
Throughout the sketching process, we’re aiming for functional drawing, not fine art. This is still true for solutions sketches. If a sketch shows the whole idea and is sufficiently detailed, then that’s the right amount of art. At this point, you may want to think about words. This doesn’t mean that you need to write all the content for a page but you can think about titles, buttons, and other pieces of text.
The format of your solution sketch could be a short 3 or 4 step storyboard, or if it’s a more focused problem, an in-depth look at a page, interaction, or transaction. Pick what works for you and the solution you’re proposing. Lastly, give it a catchy title. It will help everyone when we get to discussing the different solution sketches. ‘The big cheese’ is a lot less ambiguous than solution sketch 4a.
The next part of this series will look at the deciding, prototyping, and testing stages.